[iOS] Rick&Morty - #16 Character Detail ViewModels

이번엔 VM - View - VC를 연결하는 작업을 한다.
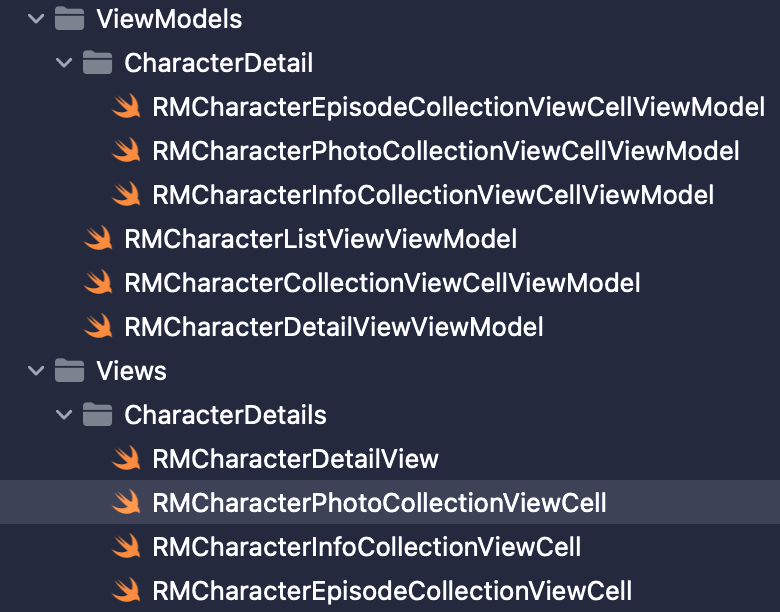
Cell의 View와 VM 생성
먼저 Views 그룹에 또다시 CharacterDetails라는 그룹을 만들어 관리하자. 여기서 RMCharacterCollectionViewCell이라는 이름으로 세 가지 셀 파일을 만들어주고 각각 대응되는 VM도 만들어서 그룹으로 묶어준다.
이제 DetailVM에서 SectionType enum으로 가서 Associated value라는것을 추가할 것이다.
enum SectionType {
        case photo(viewModel: RMCharacterPhotoCollectionViewCellViewModel)
        case information(viewModels: [RMCharacterInfoCollectionViewCellViewModel])
        case episodes(viewModels: [RMCharacterEpisodeCollectionViewCellViewModel])
    }
Associated value를 추가하면 CaseIterable 프로토콜을 준수하지 못 하게 된다. 아쉽지만 자동으로 해결하지 않고 수동으로 구현하자. init에서 더미 VM을 생성해 본다. 일단 레이아웃 구성용으로 올려놓은 거라 대충 해도 된다.
final class RMCharacterDetailViewViewModel {
    ...
    enum SectionType {
        case photo(viewModel: RMCharacterPhotoCollectionViewCellViewModel)
        case information(viewModels: [RMCharacterInfoCollectionViewCellViewModel])
        case episodes(viewModels: [RMCharacterEpisodeCollectionViewCellViewModel])
    }

    public var sections: [SectionType] = []

    // MARK: - Init
    init(character: RMCharacter) {
        self.character = character
        setUpSections()
    }
    private func setUpSections() {
        sections = [
            .photo(viewModel: .init()),
            .information(viewModels: [
                .init(),
                .init(),
                .init(),
                .init()
            ]),
            .episodes(viewModels: [
                .init(),
                .init(),
                .init(),
                .init()
            ])
        ]
    }
	  ...
}
다음은 데이터소스 작업이다. VC에서 데이터소스를 다루려면 numberOfItemsInSection을 봐야한다. section을 번호로 구분하기 때문에 우리가 위에서 생성해 둔 RMCharacterDetailViewViewModel의 sections에서 case로 받아와서 처리한다. 이렇게 안 하고 그냥 0, 1, 2로 해도 상관은 없지만 좋은 방법이라 할 수는 없을 듯하다.
- cellForItemAt에서 그냥 번호로 인식하는 방법을 나타냈다.
생성된 Cell VM의 수에 따라 item의 개수를 리턴하는 작업을 하고 색상을 칠하자.
extension RMCharacterDetailViewController: UICollectionViewDelegate, UICollectionViewDataSource {
    func numberOfSections(in collectionView: UICollectionView) -> Int {
        return viewModel.sections.count
    }
    func collectionView(_ collectionView: UICollectionView, numberOfItemsInSection section: Int) -> Int {
        let sectionType = viewModel.sections[section]
        switch sectionType {
        case .photo:
            return 1
        case .information(let viewModels):
            return viewModels.count
        case .episodes(let viewModels):
            return viewModels.count
        }
    }
    func collectionView(_ collectionView: UICollectionView, cellForItemAt indexPath: IndexPath) -> UICollectionViewCell {
        let cell = collectionView.dequeueReusableCell(withReuseIdentifier: "cell", for: indexPath)
        if indexPath.section == 0 {
            cell.backgroundColor = .systemPink
        } else if indexPath.section == 1 {
            cell.backgroundColor = .systemBlue
        } else {
            cell.backgroundColor = .systemGreen
        }
        return cell
    }
}

멋지게 셀이 잡힌걸 볼 수 있다. 아직 각 cell은 컬렉션 뷰와 연동이 안되어 있다.
Cell 연동
아래와 같은 방법으로 세 가지의 Cell에 Identifirer를 생성하자.
final class RMCharacterEpisodeCollectionViewCell: UICollectionViewCell {
    static let cellIdentifier = "RMCharacterEpisodeCollectionViewCell"
}
createCollectinoView에서 register를 만들어 셀을 등록하고 실행해 보자.
final class RMCharacterDetailView: UIView {
    ...
    private func createCollectionView() -> UICollectionView {
        ...
        collectionView.register(RMCharacterPhotoCollectionViewCell.self,
                                forCellWithReuseIdentifier: RMCharacterPhotoCollectionViewCell.cellIdentifier)
        collectionView.register(RMCharacterInfoCollectionViewCell.self,
                                forCellWithReuseIdentifier: RMCharacterInfoCollectionViewCell.cellIdentifier)
        collectionView.register(RMCharacterEpisodeCollectionViewCell.self,
                                forCellWithReuseIdentifier: RMCharacterEpisodeCollectionViewCell.cellIdentifier)
        ...
    }
}
터진다.
로그를 읽어보자.
Thread 1: "could not dequeue a view of kind: UICollectionElementKindCell
with identifier cell - must register a nib or a class for the identifier or
connect a prototype cell in a storyboard"
로그를 읽어보면 VC에서 Cell을 디큐할때 cell이라는 식별자로 빼기 때문이다. 이 문제에서 우리가 해줘야 하는 점은 동적으로 타입에 맞게 디큐를 해야 한다. 이제 item의 수를 정했던것과 유사하게 스위치를 이용하여 구현해 보자. sectionType을 구현하고 각 경우에 맞게 cell을 따로 만들어서 적용해 주자.
extension RMCharacterDetailViewController: UICollectionViewDelegate, UICollectionViewDataSource {
    ...
    func collectionView(_ collectionView: UICollectionView, cellForItemAt indexPath: IndexPath) -> UICollectionViewCell {
        let sectionType =   viewModel.sections[indexPath.section]
        switch sectionType {
        case .photo(let viewModel):
            guard let cell = collectionView.dequeueReusableCell(
                withReuseIdentifier: RMCharacterPhotoCollectionViewCell.cellIdentifier,
                for: indexPath
            ) as? RMCharacterPhotoCollectionViewCell else {
                fatalError()
            }
            cell.backgroundColor = .systemPink
            return cell
        case .information(let viewModels):
            guard let cell = collectionView.dequeueReusableCell(
                withReuseIdentifier: RMCharacterInfoCollectionViewCell.cellIdentifier,
                for: indexPath
            ) as? RMCharacterInfoCollectionViewCell else {
                fatalError()
            }
            cell.backgroundColor = .systemBlue
            return cell
        case .episodes(let viewModels):
            guard let cell = collectionView.dequeueReusableCell(
                withReuseIdentifier: RMCharacterEpisodeCollectionViewCell.cellIdentifier,
                for: indexPath
            ) as? RMCharacterEpisodeCollectionViewCell else {
                fatalError()
            }
            cell.backgroundColor = .systemGreen
            return cell
        }
    }
}
Test

똑같은 화면이지만 이제 Cell이 연결되어 데이터를 활용할 수 있게 됐다.
이제 Cell의 기본설정을 완료하고 모든 셀에 적용시켜주자. 기본적으로 해야 하는 것은 지난번과 같이 init들, constraints 설정, prepareForReuse와 configure다.
final class RMCharacterEpisodeCollectionViewCell: UICollectionViewCell {
    static let cellIdentifier = "RMCharacterEpisodeCollectionViewCell"

    override init(frame: CGRect) {
        super.init(frame: frame)
    }
    required init?(coder: NSCoder) {
        fatalError()
    }
    private func setUpConstraints() {

    }

    override func prepareForReuse() {
        super.prepareForReuse()
    }
    public func configure(with viewModel: RMCharacterEpisodeCollectionViewCellViewModel) {

    }
}
이제 VC로 가서 configure 메서드의 매개변수로 viewModel을 받자. 복수를 가져야 하는 info와 episodes의 경우에는 viewModel [indexPath.row]로 cellForItemAt으로부터 데이터를 받아 처리한다.
extension RMCharacterDetailViewController: UICollectionViewDelegate, UICollectionViewDataSource {
    ...
    func collectionView(_ collectionView: UICollectionView, cellForItemAt indexPath: IndexPath) -> UICollectionViewCell {
        ...
        case .photo(let viewModel):
            ...
            cell.configure(with: viewModel)
            ...
            return cell
        case .information(let viewModels):
            ...
            cell.configure(with: viewModels[indexPath.row])
            ...
            return cell
        case .episodes(let viewModels):
            ...
            cell.configure(with: viewModels[indexPath.row])
            ...
            return cell
        }
    }
}
Cell에 VM을 붙였다. 다음시간에 데이터를 실제로 주입해서 표현해보자
끝